New Storage Arrangements

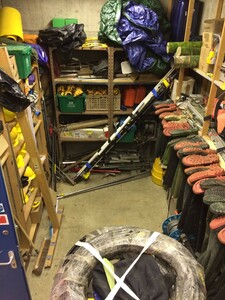
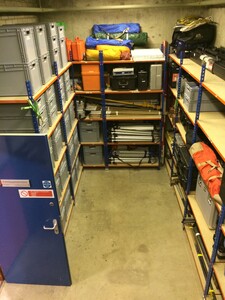
Around this time last year we gave our store room the clean-out it needed! We tore everything out and bought brand new Rapid 2 shelving from Key Industrial, alongside a load of EU standard plastic crates. Now everything has a home, is labelled, indexed and stored appropriately. We even made room for equipment dispatch and receiving and a work bench for preparing kit. Just look at the difference!

Before
Before
and after!
and after!

You Should Write Your Thesis in LaTeX

Microsoft Word sucks for large, technical documents. It can be cajoled, fudged and forced into sort-of doing what you what, but for a really professional finish, you should consider writing in LaTeX. It isn’t any quicker, as you’ll spend just as long working out how to get it to do what you want, but it is less frustrating, as you can a) read the code to diagnose the problem, b) there are free add-on packages of code that seem to solve every possible problem or task you could come up with, and c) it is fully documented, with examples. Oh, and it is all distributed under a GPL licence!

For example, do you need to make a figure go sideways but want the caption, header and footer correctly orientated? There’s a package for that – it even ensures the figure faces the correct direction depending on whether it is on an odd or even page. Do you need to quote passages of code in your work and have them automatically formatted with line breaks, numbers and monospace font? There’s a package for that too.

I inherited a document template for typesetting theses in LaTeX, and along with a couple of my postgraduate contemporaries we fixed, improved and fully commented the code. It fits the specification for theses submitted to the University of Southampton but can be easily adapted for other specifications. The template works well with TEXnicCentre and MiKTeX.

Incidentally, I run a one-day workshop called “Typesetting Your Thesis in LaTeX”, that will next run on the 3rd of February 2015, 1000-1600. If you’re a University of Southampton student and would like to attend, just get in touch. The course blurb is below:

The course will cover:

  • The basics
  • How to use the University Thesis Document
  • How to write text in LaTeX, use inline references and cross-reference
  • Adding figures, writing equations and drawing tables with LaTeX

LaTeX could be for you if:

  • You want beautiful documents
  • You are frustrated with the mysterious, unpredictable and frustrating things Microsoft Word does
  • Your thesis contains lots of equations, technical notation or complex tables
  • Your thesis contains long quotes or code extracts

LaTeX might not be for you if:

  • You are really happy using your current editor and doesn’t see what all the fuss is about
  • You’ve tried mark-up languages before and it totally wasn’t for you
  • You are going to have your thesis professionally typeset by someone else

Testing Our New sUAS

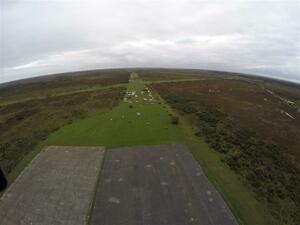
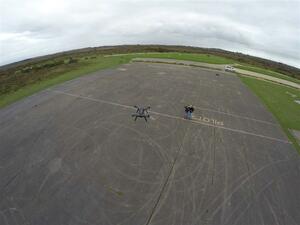
This week we were testing our new sUAS systems. Firstly, we tested the DJI F450 Naza-M v2 we’ve been running for a while. This should have been a strait forward function test, but it threw up the surprise that the DJI Ground Station software still hasn’t been updated the play nicely with iOS 9.1; this is a pretty poor show from DJI as this is our go-to software for running this platform. Thankfully we can still resort to Ground Station 4.0.11 for Windows.

Second up is our new DJI S1000 with A2 flight controller – without iOS downlink of course! This flies wonderfully in some pretty strong winds, although the DJI Assistant software can’t seem to be coaxed into reliably writing any updates to the unit. Again, the DJI A2 Assistant 1.8 for Windows seems to play nicely. We’re flying this using Futaba rather than Spektrum controllers – I’ll do a full comparison in another blog, but for now I’ll say that I was impressed at some of the features of the system. We stuck a few kilos of dead weight on it and again, it performed well even in high winds – although the no payload flight time (15mins) dropped to about a third of that with a payload!

Lastly we tested our two new 3DR Solo systems. These are fitted with dual MAPIR cameras (one visible, one nIR) for NDVI sensing. These cameras don’t seem to play nicely with either the Samsung Exo or the SanDisk Extreme microSDXC cards I used – I suspect they’ll play just fine with standard 32gb microSDHC cards. I was surprised at just how simple these are to use and how good the range is on the 2.4ghz downlinks, especially the one for live video feed. One of these has a gimballed GoPro Hero 4 on-board with live downlink, although the downlink plays nicely with the MAPIR cameras – we took some photos, obviously.


Drone Photo - AirfieldDrone Photo - Pilots

Lab Bookings Poster

One of the first things I did when I took responsibility for our laboratory is bring in a giant lab bookings board. This one is designed so you can easily rotate the weeks around without having to transfer all the bookings. Have it gloss encapsulated so you can use dry wipe markers on it! Feel free to re-use it under the CC licence below.


Lab Bookings Poster


Creative Commons Licence
Lab Bookings Board v.1 by Tom Bishop is licensed under a Creative Commons Attribution 4.0 International License.

Miniature Temperature Probes for Environmental Sensing

A while back we needed a number of small temperature and humidity loggers for use on student projects that often require this kind of basic kit. There’s tonnes of this stuff on the market, but we were looking for something water or weather-proof with a user-serviceable battery.

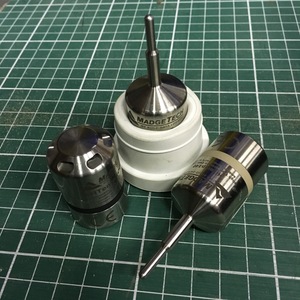
We bought some MadgeTech Temp1000 units and a couple of RHTemp1000‘s. They are very well-made, rugged, and use standard 1/2AA 3.6V lithium batteries. The temperature only units are waterproof, and the temperature/humidity units are weatherproof. They use a serial interface adaptor that has a USB connection to the PC, and the freely-available MadgeTech4 software.

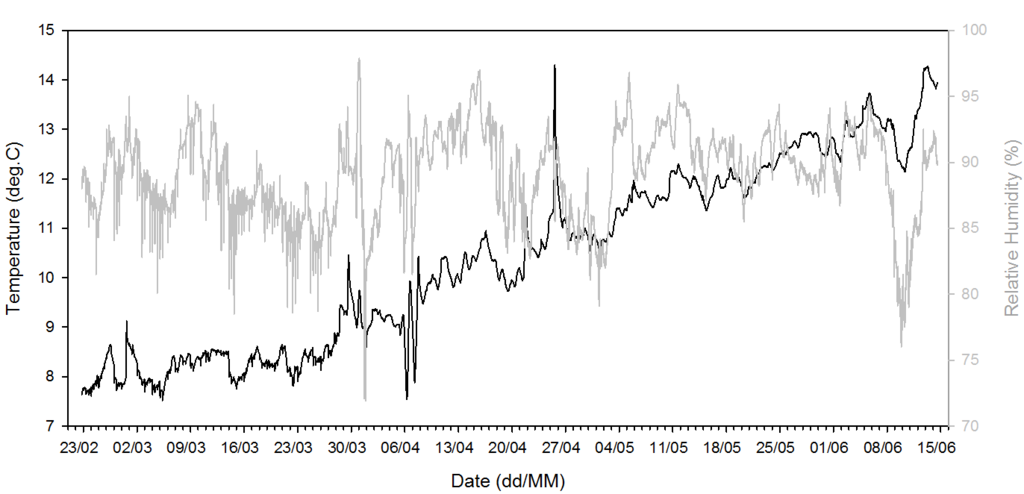
I left one running for a few weeks in a small warehouse underneath a railway arch – I’ve shown the results below. A couple of top-tips: those little sticky tea-towel holders make perfect adhesive mounts for these units, and if you use inspection stickers, be careful that you place them on the unit in such a way as to not obscure the contacts of the serial interface.

I’m now thinking of trying their Level1000 loggers instead of the Schlumberger “Diver’s” which do not have replaceable batteries.


IMG_1918


Exemplar temperature and humidity logger data from a warehouse underneath a railway arch. Logging interval was 10mins.


Augmented Reality Sandbox

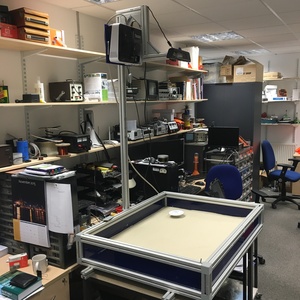
I was asked to make an augmented reality sandbox like that produced by Oliver Kreylos & team, following the excellent instructions on their website. I’ve now finished the manufacture of the equipment and I’ve passed it over for programming by our electronics technician. I thought I’d share my cutting list for anyone considering making their own. Once it’s all up and running I’ll try and get it written up as a detailed set of instructions.

AR Sandbox

  • Profile 8 40mmx40mm: 750mm x4, 1000mm x4, 100mm x4, 1500mm x1, 200mm x2, 300mm x1
  • 5mm Sheet acrylic: 1020x120mm x2, 1020×770 x1, 770×120 x2, 290x230mm x1
  • Angle bracket set 8 40×40 x4
  • Angle bracket set 8 80×80 x3
  • Fastening set 8 40x40x40 x8
  • Silicone sealant x1 tube

UPDATE 20/1/16:

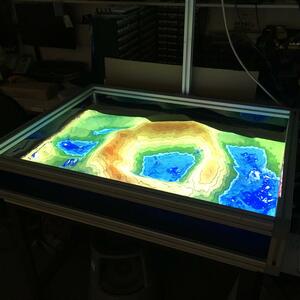
Darius showed me the software working yesterday – look how awesome it is! Everyone who came in the office was instantly attracted to it and channelled their inner geographers – we’re going to have a lot of fun with this on open days etc.

IMG_2043 (Large)

ciBioBase & Lowrance Fish-Finders for Bathymetry

I recently came across Navico Inc.’s ciBioBase service, and I’ve recently had an opportunity to test it out. It takes data from a range of Lowrance fish-finders and processes it for bathymetry, vegetation and bottom-reflector hardness. We bought a Lowrance Elite-4 HDI and fitted it with a microSD card (note – don’t try using a microSDXC card, as they don’t work). It records raw data from the various sonar and GPS sensors on the unit, which could easily be fitted to a small inflatable boat, ROV or ASV, and saves them to the microSD. On uploading the data to the ciBioBase website, you are given the option of combining multiple files (trips) into a single job.

And, that’s it! It automagically generates the bathymetry and maps it using a Google Earth base map. It also produces an vegetation biomass index and vegetation height, which is useful for delineating the profundal/littoral zones, and a bottom-hardness index, which is particularly useful for choosing suitable locations for sediment samples. The data can be exported as .csv files in either gridded or original point data for use in ArcGIS or other desktop GIS. There’s quite a bit of other functionality I haven’t explored much, but for our purposes this covers the main features.

The data is saved in a proprietary binary format. I understand that some have had some success in hacking this to extract depth and positional data, but it requires the ability to manipulate binary data. If you want to save money, the consumer version of the system, Insight Genesis, should be considered – the catch is the data is integrated into public maps for use by other Lowrance users unless you pay the annual subscription ($99). There are also no export functions – this is really for visualisation only. I note that .gpx files can be exported from Insight Genesis, so anyone who can manipulate XML data will probably be able to extract depth and position data to create their own bathymetry in this way – the vegetation and bottom hardness are derived from the raw data so you’ll have to use ciBioBase if you want to export that. I notice ciBioBase don’t advertise their prices on the website, so I’ll just note that their rep’s are knowledgeable and open to discussions about user budgets and requirements.

When more information is required, our SyQwest Bathy-2010 PC precision chirp profiler, which can produce sub-bottom profiles of sediment depth and structure alongside water depth is of use, but it’s overkill for most applications. This system provides a way to quickly produce useful bathymetric, vegetation and sediment data with very little capital investment and no need for any technical knowledge.

Professional Registration for Technicians

I recently completed the process for registration with the Science Council as a science technician (RSciTech), and thought I’d share my experience for the benefit of other technicians considering applying. Some background on the register – the Science Council has had a professional registration scheme (chartered scientist) scheme running since 2004; registered scientist and registered science technician followed in 2012.  There are at the time of writing 29 different professional societies that are licenced under the scheme.

I am often asked the question, “are you applying for postdoc positions?” or “how long do you think you will be a technician?”. Although I’ve never ruled out going into an academic position, I chose to become a technician; I’m not here because I failed to find work as an academic – this is often the assumption people make. I was thinking about ways to convey this to others, particularly on my CV. When I heard about the scheme via our regional HeATED network, joining the Science Council register of science technicians seemed an obvious move.

I applied via the Institute of Science & Technology (IST). I would have preferred to apply via a more specialist society or institute (like the Royal Geographical Society), but the IST seemed the most relevant body that is licenced. The application with the IST is pretty strait forward – become a member, and apply with a CV, CPD training records, copies of qualifications, and complete the competencies questionnaire – this is best completed with reference to the guidance and example documents at hand. Two references are also required. The application is assessed by fellows of the institute, and a decision is made, including guidance and advice if the application is unsuccessful.

It didn’t take me long to complete – I spent an evening reading through the guidance notes, and managed to draft it all on a rainy Sunday afternoon, although I did then spend a few evenings the following week proof-reading and tweaking the application. In hindsight, I wonder whether I should have applied for registration as a scientist; having subsequently read through the specifications, this might be more aligned with my current position. It’s something I’m going to consider re-applying for next year, as a submission of CPD records is required annually anyway to retain registration. The Science Council website www.professionalregisters.org has a short questionnaire that can tell you quickly if, and for what, you may be eligible for.


British Standard for First Aid Kits

There seems to be an agreed standard for everything! I’ve just been checking our first aid kits against the current British Standard 8599-1:2011, for first aid kits in the workplace, and interestingly there are some differences. The British Standard isn’t a legal requirement – I understand the provision of first aid kits is governed by The Health and Safety (First-Aid) Regulations 1981, which only requires “adequate and appropriate equipment”, but the British Standard is a pretty good starting point.

I suppose additional equipment may be required depending on the organisation, task or people involved. In particular, the provision of specialist burns dressings is required to meet the British Standard, but are often omitted in kits available commercially. There is also an associated British Standard for vehicle first aid kits.

New Standards for Safety Signage

I’m sure most laboratories are aware, but there are new requirements for warning labels in laboratories now. The old CHIP pictograms (black on yellow squares) have been replaced with the CLP pictograms (black on white and red diamonds), and although the regulations arrived in 2009, since June 2015 it is a requirement to use them alone. There is an exemption for goods already in the supply chain, so it seems we don’t need to re-label existing stocks, but it seems good practice to have a single, harmonised system in any laboratory.

This also has prompted me to replace our laboratory signage – see the before and after photo’s below. Can you spot the BS3864-1 non-compliances in these photographs?


Old lab signageNew lab signage


UPDATE 20.1.16:

I’ve got round for doing upstairs now – here’s the before and after photos.


IMG_1982 (Large)IMG_2039 (Large)