Following a postgraduate course on LaTeX, I include here some new resources (see my previous post for details on LaTeX and the course). Firstly, I’ve updated the University Thesis Document with some code and comments that:
add a third supervisor: just follow the comments – let me know if this is successful for you.
removes the code to add \textsubscript – Rob emailed to say that in newer implementations of MiKTeX this command is native, so doesn’t need to be created
Some folks asked how to change it to a Master’s dissertation – just do a CTRL+H in thesis.tex and thesis.tcp and replace the offending text strings
This will invalidate your warranty and could be a terrible idea – I haven’t fully tested this yet!
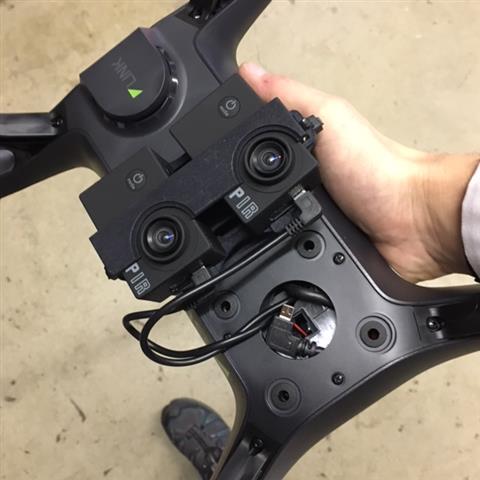
If you are using MAPIR cameras on a 3DR Solo drone, you might want to dispense with the camera battery packs (which aren’t great) and power the units through the microUSB socket. To do this, you’ll need to find 5v from inside the airframe. I’ve done this by piggybacking a UBEC onto the main power rails and connecting two microUSB leads. Here’s how I did it:
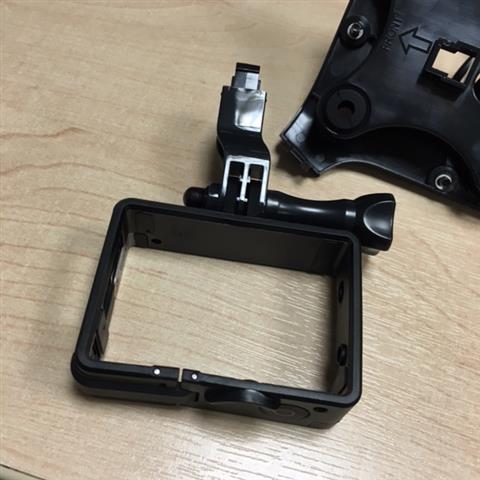
Remove the static gimbal and dis-assemble it to remove the GoPro frame (use square nosed pliers). This only wants removing if it’s surplus to requirements; you could leave it on.
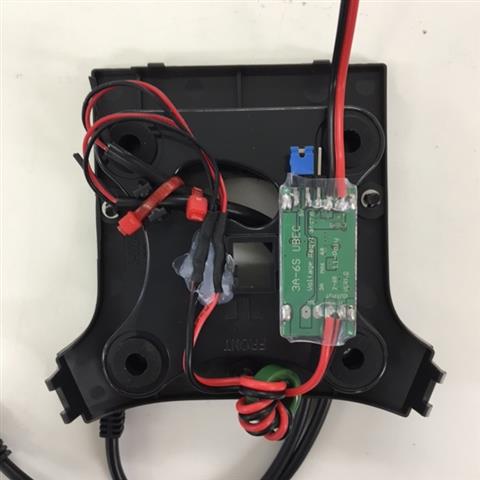
Cable tie the two microUSB to bare end wires onto the side of the frame.
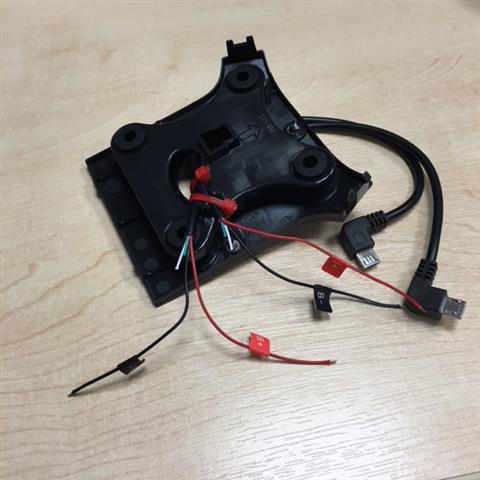
Place a strip of double-sided sticky foam fixing to the UBEC & configure the UBEC for 5v output. Affix it to the top of the static gimbal frame.
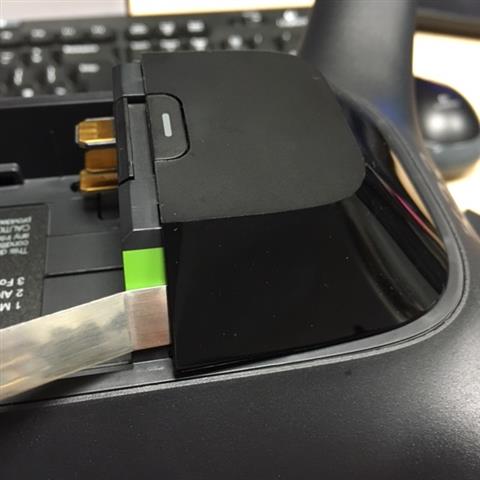
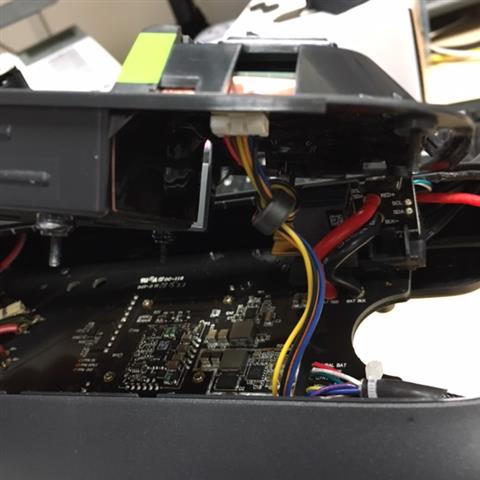
Use a spudger to remove the top cover adjacent to the battery compartment.
Unscrew all 7 screws to remove the top tray, careful to disconnect it from the main board as you remove it.
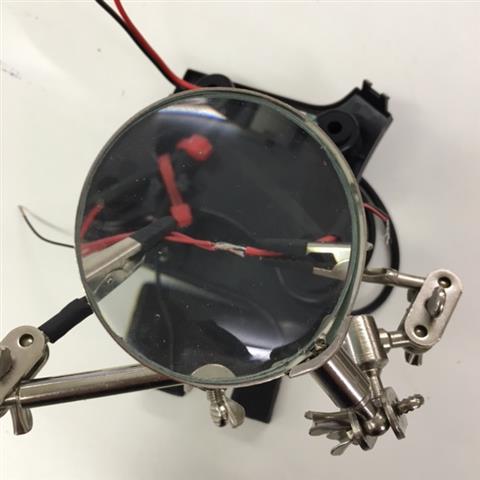
Solder the +ive and -ive power wires from the microUSB plugs to the +ive and -ive output wires from the UBEC. Use heat-shrink tubing to cover the join & secure the cables using some hot glue.
Reinstall the static gimbal, feeding the UBEC power input wires up above the main board, and the video connector (miniUSB) down through the static gimbal.
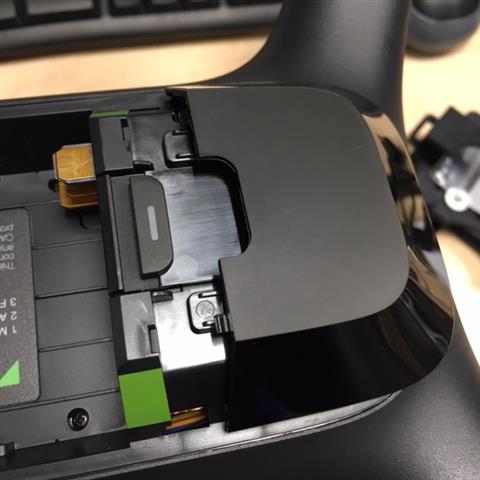
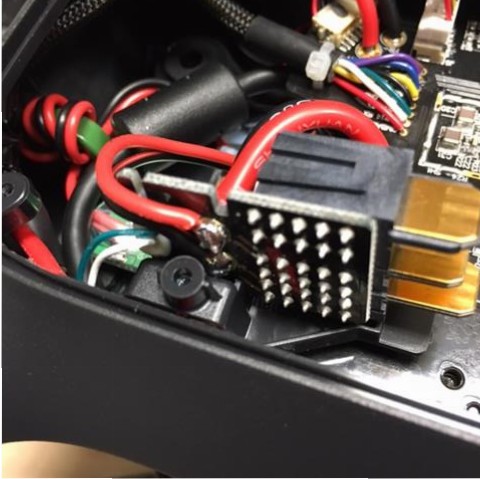
Unseat the main power connector board (it is simply clipped in).
Solder the +ive and -ive UBEC input wires to the main power terminals.
Cover with insulating paint (if, like me, you worry about how close those two main connectors seem to be!).
Replace the main power connector board, top tray connection and top tray, fix the camera mounts and test.
I suppose it could be possible to find 5v somewhere else – I can see a couple of terminals on the main board marked 5v, but I have no idea what kind of draw they can handle or whether they are always on, so the UBEC seemed to be the simplest option, if not a little invasive. If I were to change anything I’d add an inline plug and socket to the UBEC, making it easy to remove if the gimbal wanted changing.
I’ve just heard the embargo on my thesis has been lifted – the full text is available here, abstract below.
Bishop, Thomas H. (2015) A palaeolimnological investigation of central Patagonian climate during the holocene.University of Southampton, School of Geography, Doctoral Thesis, 308pp.
A Palaeolimnological Investigation of Central Patagonian Climate During the Holocene
The southern westerly winds are the dominant control on climate in central Patagonia, and there is ample evidence of changes in the position and strength of the winds throughout the Holocene, but the timing, nature and extent of these changes is unclear. This study addresses the lack of palaeoclimatic data for the region east of the North Patagonian Icecap to address the uncertainties surrounding Holocene climate in the central Patagonian region.
By correlating multi-proxy (sediment δ13C & C/N, chironomids and magnetic susceptibility) data from two palaeoclimatic reconstructions derived from lake sediment sequences, this study identifies a unique climate history for central Patagonia, where mid-Holocene shifts observed elsewhere in Patagonia are subdued, but late-Holocene aridity between 1,300_2,800 years B.P. and cooler conditions from c.1,500 years B.P. onwards are present. Chironomid stratigraphies appear to respond primarily to lake level changes, and recently developed chironomid temperature transfer functions fail to provide reasonable estimates of temperature change over the past c.120 years at these study sites.
Modern vegetation δ13C, C/N and modern water δ2H and δ18O data are presented, along with age/depth models for the two study sites derived from 14C, 210Pb, 137Cs and tephrochronological markers. Geochemical data for a number of previously known and unknown tephras are also presented.
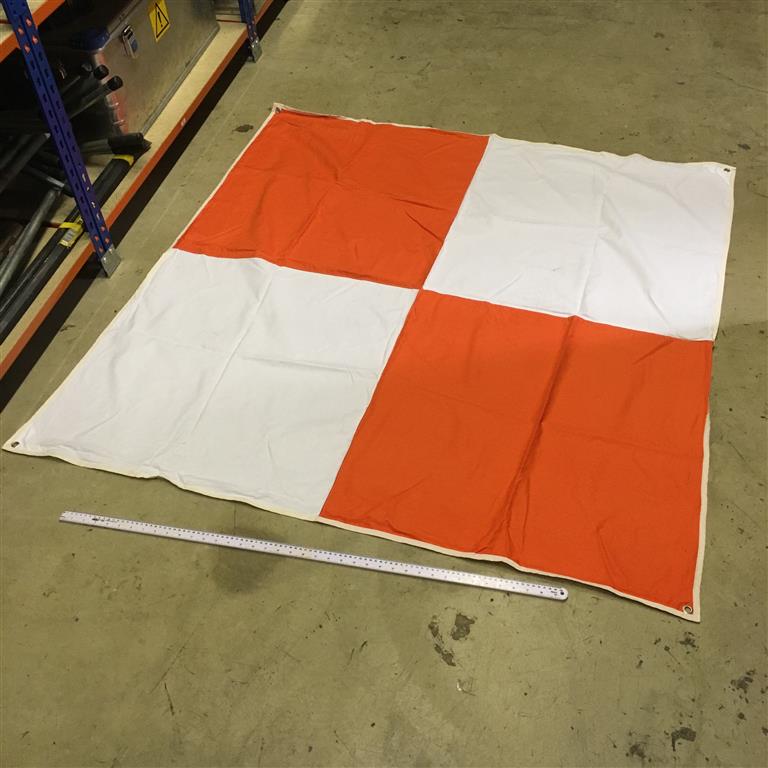
We’ve used all sorts of things as ground control markers in aerial survey before – indeed, if sufficiently obvious points exist, they can be georeferenced. Where this is not possible, I’ve used orange bivouac bags and a combination of tarpaulins and duct tape. These usually only lasted a few days to weeks, and then were disposed of. This got me thinking – I wonder if I could find a more hard-wearing solution. I couldn’t – so I designed some, and my colleague Hayley Goodes made them. I think they are excellent!
They are white-orange Battenberg design cotton flags, approximately 150cm square, and black gaffer tape can be placed as roman numerals across them to identify them if required. They have brass eyelets for pegging down or otherwise securing, are fully hemmed, and can be machine washed.
Hayley deserves most of the credit as she did all the hard work.
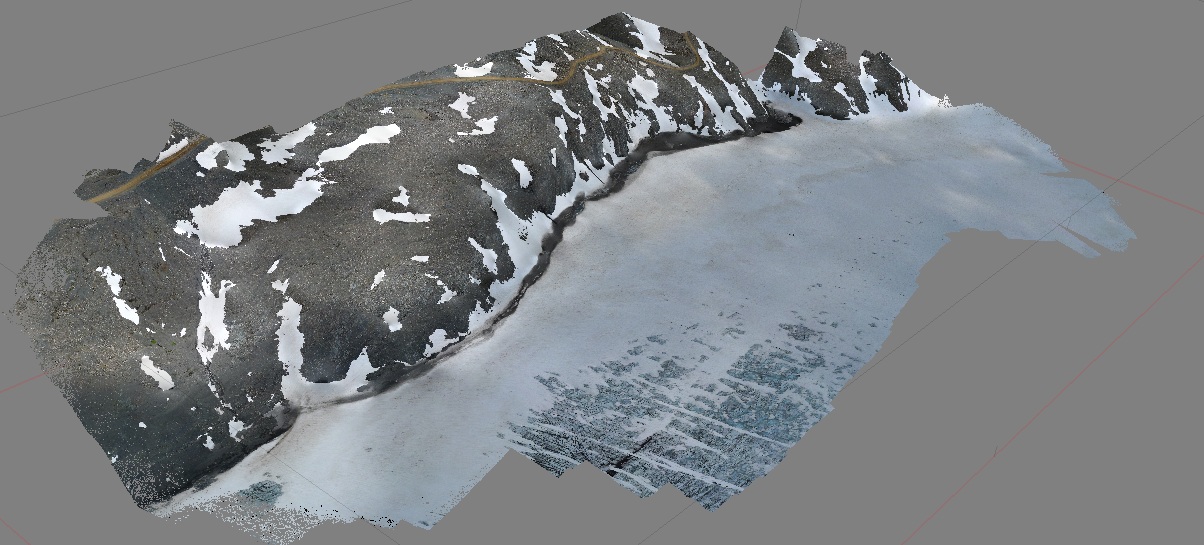
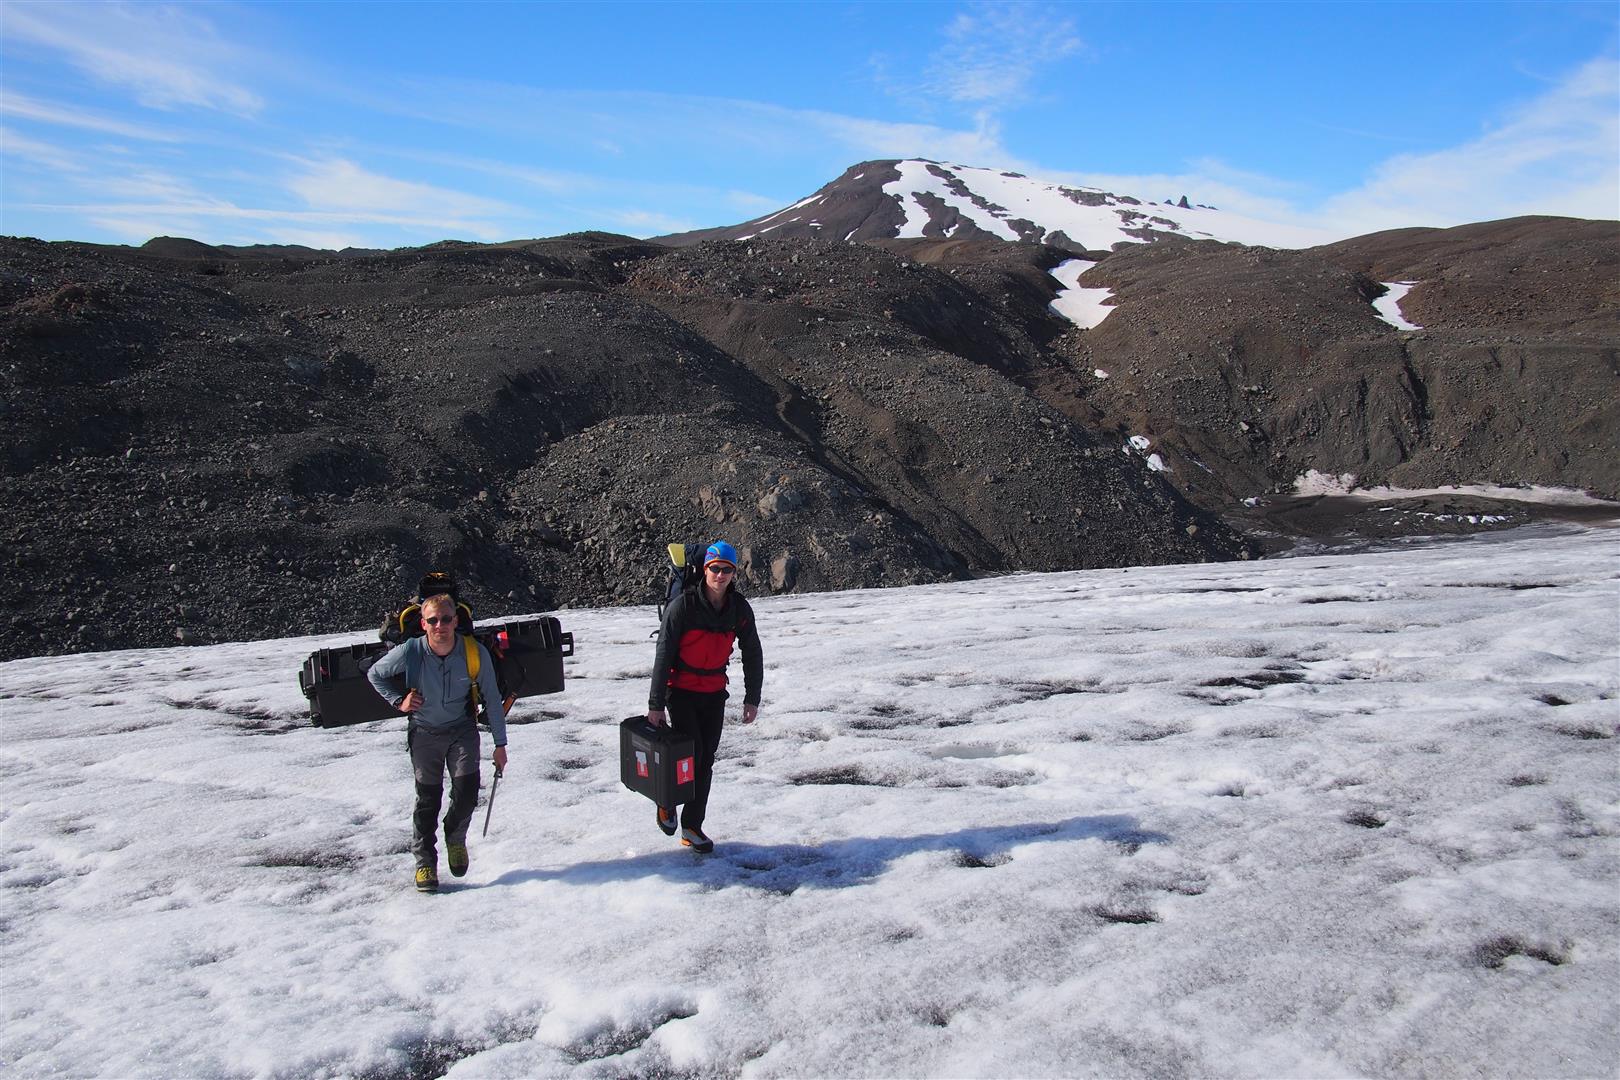
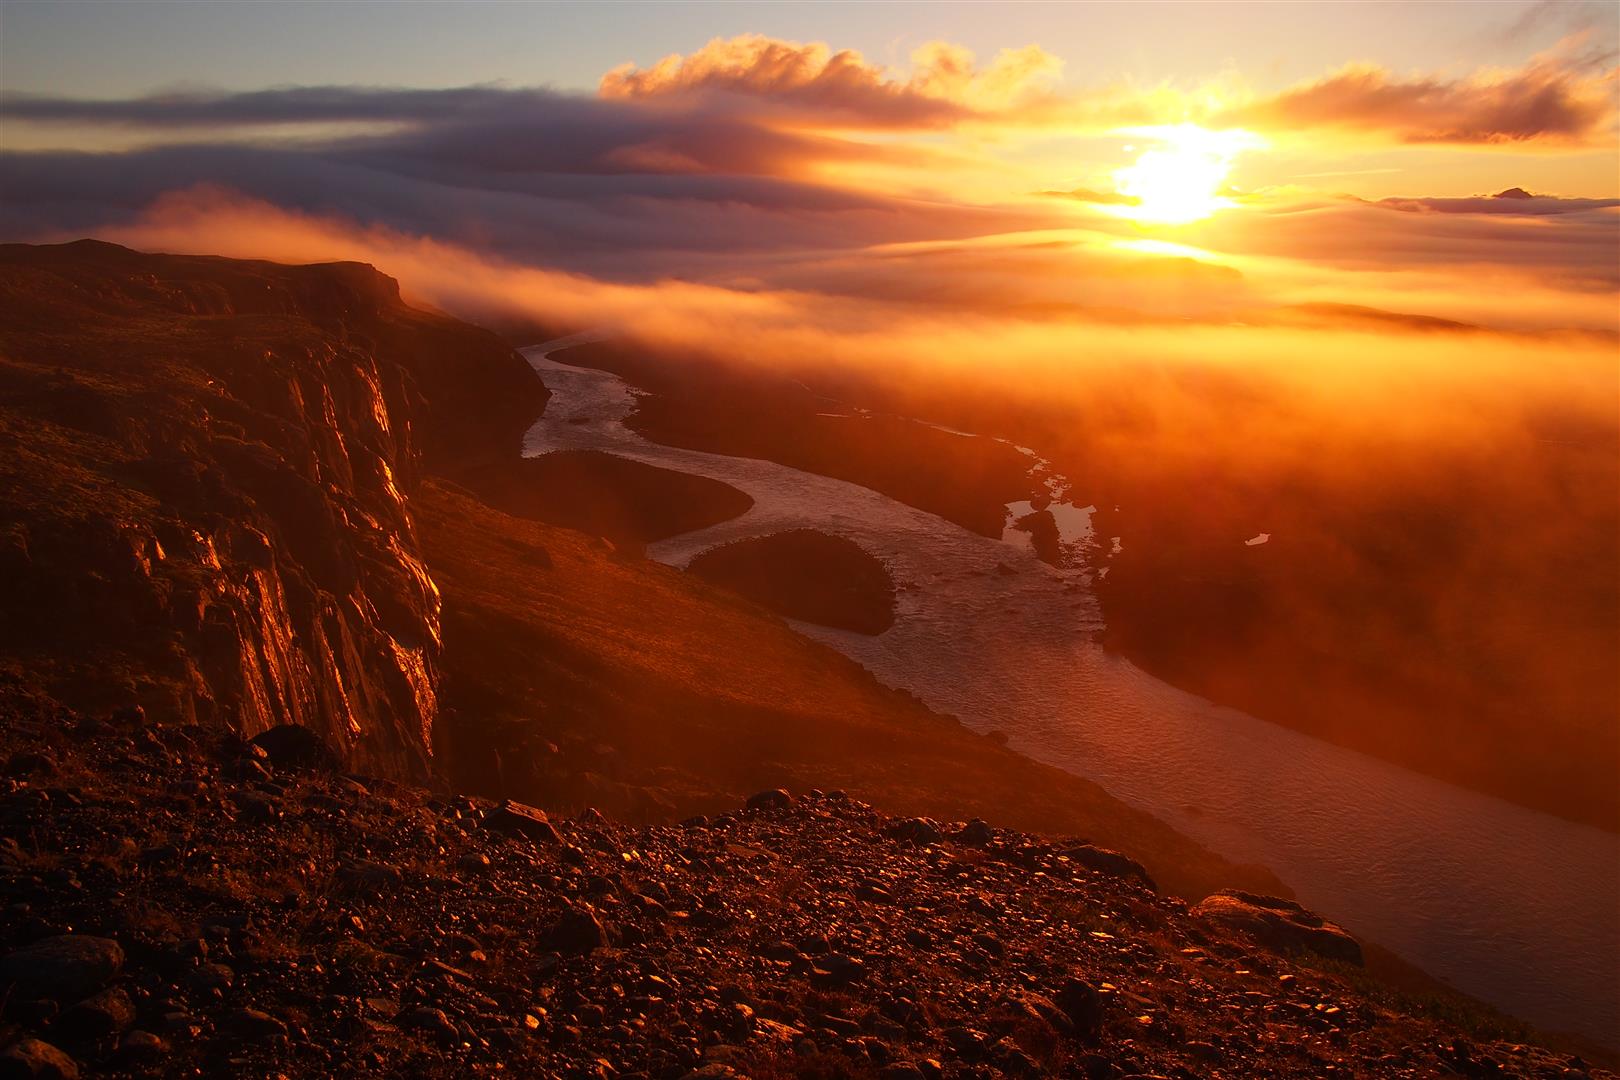
I’ve just stumbled across this old article about some work I did in Iceland with Alex Clayton as part of his PhD research into glacial movement and modelling. We had a great time and got some good work done – so much so we went back a year later (with assistance in the field from outdoor instructor James O’Dwyer) and did a load more survey of the forelands in some challenging conditions. Alex has put some clips of our takeoffs and landings (some better than others) on his Youtube channel, and I’ve put an example of the kind of topographic model we produced below (first expedition), along with a couple of photos from the second expedition.
Topographic model of part of the glacier, derived from structure-from-motion, produced in Agisoft Photoscan.Tom Bishop and James O’Dwyer carry the sUAV system onto the glacier.Sunrise as we make a (very) early morning hike into our survey location on the foreland.
I attended the HEaTED South Coast Regional Network Event, which was held at the University of Southampton on the 18th of December. Attendance was excellent, and we were welcomed by Pam Morgan and Sue Churn, who updated us on the recent changes on work of the HEaTED network, including the introduction of the CATTS tool for staff assessment. Tamsyn Smith followed with a presentation about online presence and social media. I was surprised to see, from the rather natty online polling she conducted of the room (using Mentimeter), that I was the only person that blogged!
This was followed by what was for me the highlight of the day – Hendrik Ulbright gave a presentation on quantum physics that although intellectually challenging, was humorous and accessible. It was of particular interest to me as I’m currently in the middle of Brian Cox and Jeff Forshaw’s book “The Quantum Universe: Everything That Can Happen Does Happen”. He clearly knew his audience and made a number of knowing references to the impossible things he asks of his technicians and their ability to assist in completing his technically complex experiments (one of which involved swinging half a tonne of lead about!).
The afternoon consisted of a couple of presentations designed for public outreach – one from the mobile planetarium (Astrodome) and another from the physics department on lasers (Light Express). We designed and deliver outreach activities as part of the University of Southampton’s Science and Engineering Day, as well as to visiting school groups, and it is useful to see what others are doing and how they present their work.
Along with professional registration, networks like HEaTED are slowly changing the image of science technicians across the UK from the stereotype of bottle washers and technomancers to better reflect the professional scientists we are.
I’ve been doing some laser granulometry recently. This affords me time in-between sample changeovers to do other things nearby, and I’ve taken the opportunity to design and manufacture some useful little tools for the lab.
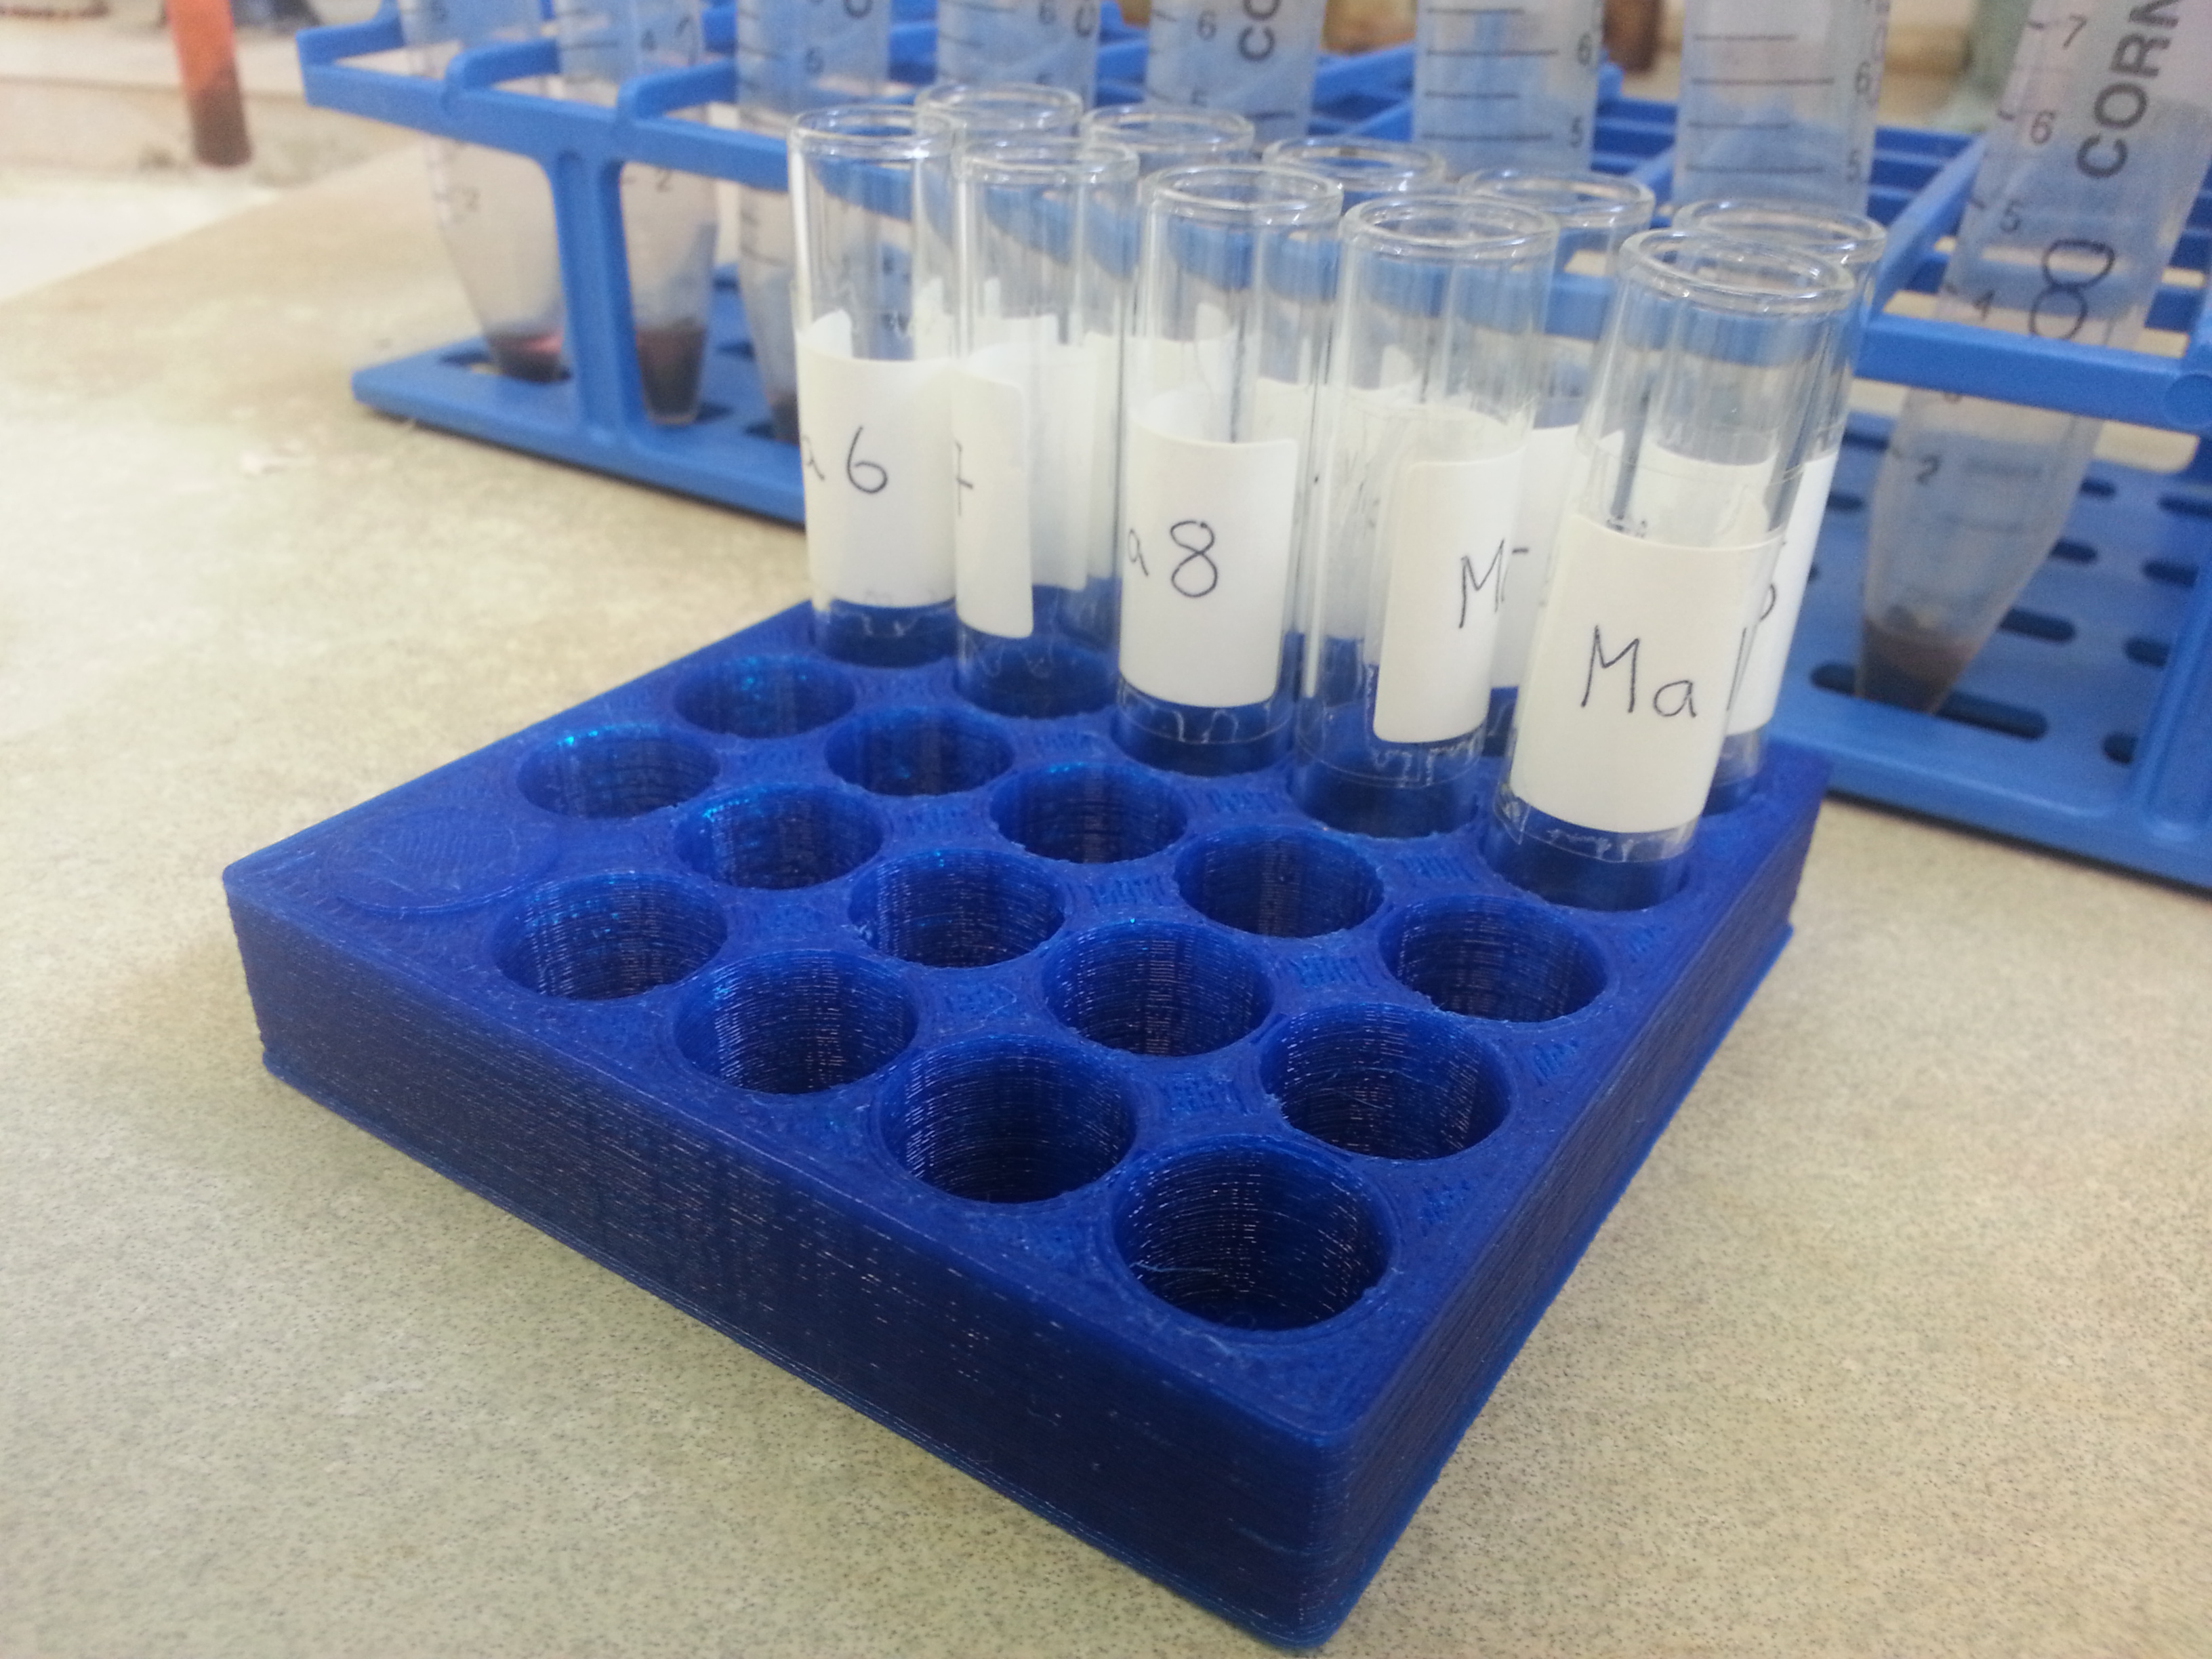
The first item was a tray for the small 4ml glass vials we use for storing pollen concentrates (Fisher #14811582) and completed micro-charcoal and SCP concentrates. Although cardboard boxes are available for these (Fisher #10384573), and wire racks that, although a little big, are low enough profile to work (e.g. Starlabs #E2396-1612), we didn’t have anything suitable for regular handling of samples in the laboratory. The withdrawal of the “Denleystor” range (e.g. Fisher #12448081) is a real shame, as these were perfect for the task. Never mind – I designed a 24-place tray especially for these 4ml vials – see the pictures below (24 is a full batch of pollen, SCP or micro-charcoal samples for us). They make the samples easier to handle and the sample delivery more professional.
24 place 4ml vial tray. Photo credit: Hayley Goodes
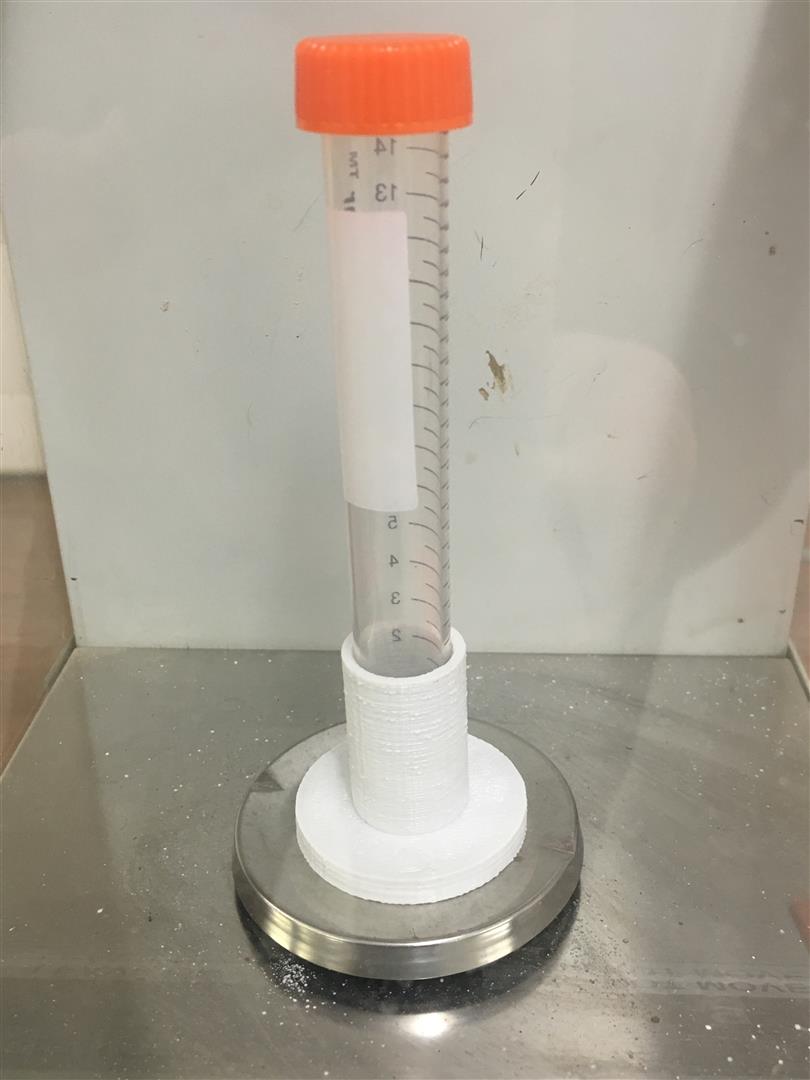
The second and third item was inspired by an undergraduate student who was having trouble weighing 15ml centrifuge tubes. Although they knew they could stand them inside glassware, all of the beakers they chose caused an overweight condition on the microbalance. I very quickly made a simple centrifuge tube holder – see the photo. I’ve made versions for both 15 and 50ml tubes (e.g. Fisher #10738771 and #11512303) and put them by the lab balances.
15ml centrifuge tube holder
These were designed using 123D Design and printed on our Velleman K8200. The files are available here. I’ve made them available under a Creative Commons licence (below). Do you want to buy these things? I keep a stock for sale – click here for more information.
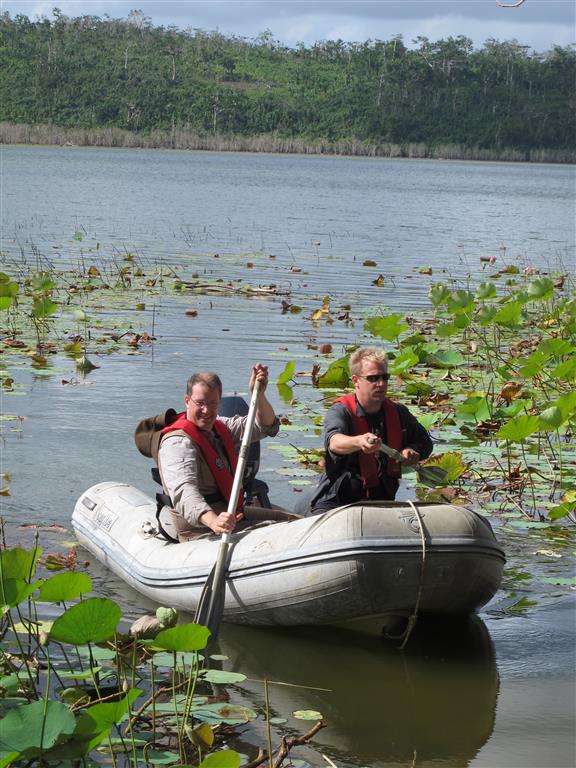
In October we visited the island nation of Vanuatu in the South Pacific, and the recent BBC coverage of the climate change conference in Paris reminded me to write a little about my experiences. My role on this trip was to provide technical support for the limnological investigation, specifically: the single-beam bathymetric surveyor, the water quality-profiler, and the coring equipment. I’ve written elsewhere about our experiences with the Lowrance bathymetric surveying system, and the YSI EXO-1 Sonde was fitted with depth, temperature, pH, DO and conductivity sensors for profiling. We took with us a UWITEC gravity corer and a GEOCORE rod-driven coring system to retrieve sediment sequences from the lake. This part of the work was successful and I look forward to writing more as we progress with this work.
I had the opportunity to spend time with staff from the Vanuatu Meteorological Office as well as the Ministry of Mines and Natural Resources, and I learnt a great deal about how climate and climate change is affecting those on the island. Having just recovered from the devastating Cyclone Pam in March 2015, the nation is now dealing with a drought caused directly by the strong el-Nino (ENSO) this year. Food crops that failed due to damage from Pam are now being affected by the drought, and emergency food distribution is already taking place in some areas due to malnutrition. Dehydration is also a problem for children and there is talk of evacuations in some areas.
Palaeoclimatic reconstructions from sedimentary archives like lakes and peat bogs can help in establishing baseline conditions for e.g. rainfall or temperature over long periods of the past, giving perspective on current climate conditions and improving our understanding of process and our ability to predict future climate.