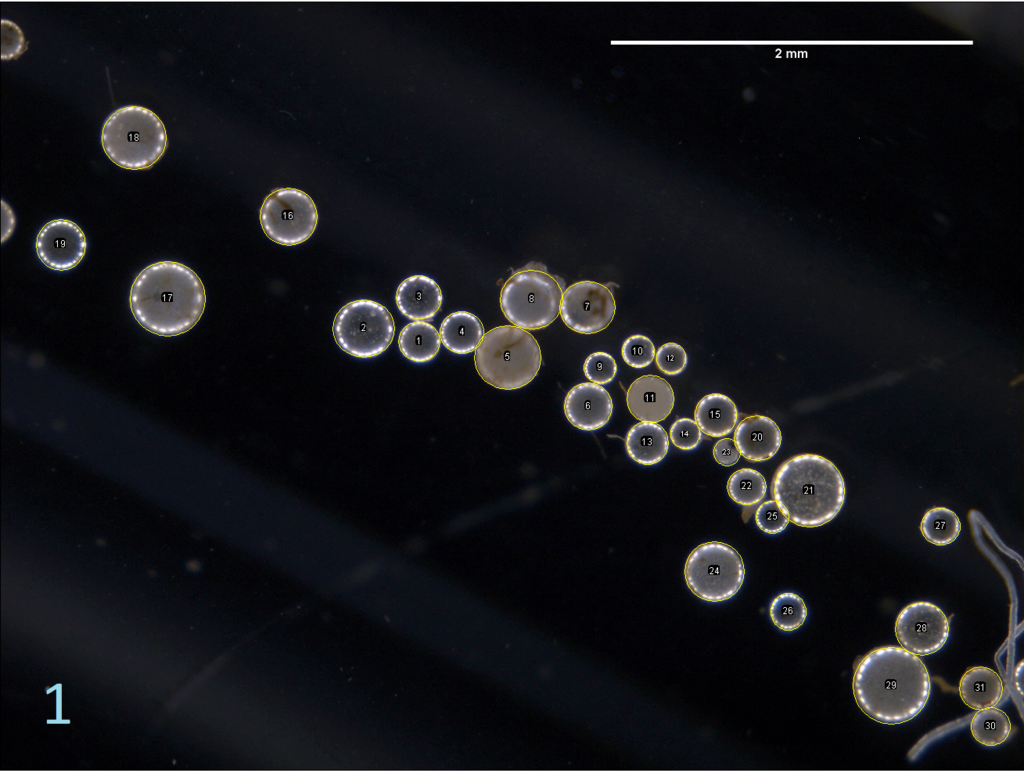
Many of our lab users have been trying to use various Zeiss software packages to make measurements from photomicrographs. It is often easier and quicker to use ImageJ to make these measurements.

Here’s how:
Image Acquisition
- Use the Zeiss Zen to acquire an image of a graticule or rule under the magnification settings you will using for your imaging.
- Acquire the images you need.
- Save the images in the Zen software as JPEG or TIFF files. Remember, keep your filenames and folder structure organised!
Calibrating the Scale
- Open the ImageJ software. Open the image of the graticule or rule by selecting File > Open…
- Using the line tool (5th button from the left), select two points of known distance. It is best to use the widest possible two points for best accuracy (e.g. if you can see 2 mm of marks in the image, don’t select only 1 mm mark distance). Use the zoom controls (10th from the left, then + and – keys) as required.
- Click Analyze > Set Scale… and type the known distance (e.g. 2) in the second box down. Also, write the units (e.g. mm) in the appropriate box. Check the “Global” box to apply this to all images.
- If you have changed the magnification, you can change the scale manually by adjusting the Known distance or Distance in pixels, but it is usually better to perform a new calibration for each magnification.
Making Measurements
- Open the image file you wish to analyse using File > Open… or File > Open Next.
- Select Analyze > Tools > ROI Manager.
- Check the “Show All” and “Labels” boxes in the ROI Manager dialogue.
- Using the straight line tool, select the edges of the object you want to measure. Press the [T] key or click the Add button in the ROI Manager.
- Repeat until you have selected all of the objects you wish to measure.
If you are measuring circular or oval objects, you may have better results using the oval selection tool (second from the left). You may wish to experiment with different selection tools depending on your measurement.
Exporting Data
- When you have selected all of the objects you wish to measure, select “Measure” in the ROI Manager.
- You may wish to obtain summary statistics – in this case, select Results > Summarize.
- The Results dialogue will open. Save the data by selecting File > Save As…
- If you name your file with a *.csv extension, you will be able to open it directly in statistics software of your choice.
Automated Analysis
You don’t have to select everything manually. The particles can be analysed automatically. Firstly, the colour image needs to be converted into binary. Then, individual particles need to be separated where they overlap, and finally, the automatic particle recognition can be run and summary statistics obtained.
- Open the image file and ensure the scale is set correctly.
- Open image > adjust > colour threshold and adjust the settings so that the particles are correctly picked out from the background. Set the Threshold colour to black & white.
- Convert the image to black and white format by selecting Image > Type > 8-bit
- If the particles have “holes” in, select Process > Binary > Fill Holes. You should see the particles fill.
- To sort out overlapping particles, select Process > Binary > Watershed. You should see small white lines between all the particles.
- Select Analyze > Analyze Particles. You may need to adjust the size range to eliminate objects that are not of interest. Note the size is expressed in mm^2, so for circular objects you’ll need to convert using area = 3.14 * diameter/2. The lower end of the circularity setting can also be adjusted for optimum results. For the example image I’ve used a size range of 0.01-4mm^2 and a circularity of 0.6-1.
- In the show menu, select “Ellipses”.
- Select “Add to manager”, “Exclude on edges”, and use “Display results”, “Clear results” and “Summarize” as required.
- You can manually delete or add ellipses using the ROI Manager.
Other Tools
There’s loads of useful tools in ImageJ, including many that can speed up and improve repetitive workflows, and assist in preparing images for publication. Just pop by the office for a chat if you are interested in a demonstration of some features.